Image data augmentation is a technique for artificially increasing the size of a training dataset by producing modified versions of the images in the dataset. Deep learning neural network models that are trained on more data can provide more skilled models, and image augmentation techniques can produce variants of the images that can increase the training dataset. To achieve this, we’ll be using Keras deep learning neural network library.
Keras ImageDataGenerator is a fantastic tool! It allows you to make real-time modifications to your images while your model is still training! As each training image is passed to the model, you can apply whatever random modifications you like. This will not only make your model more robust, but it will also save you memory! Let’s take a closer look at the various ways in which this class is useful for image augmentation.
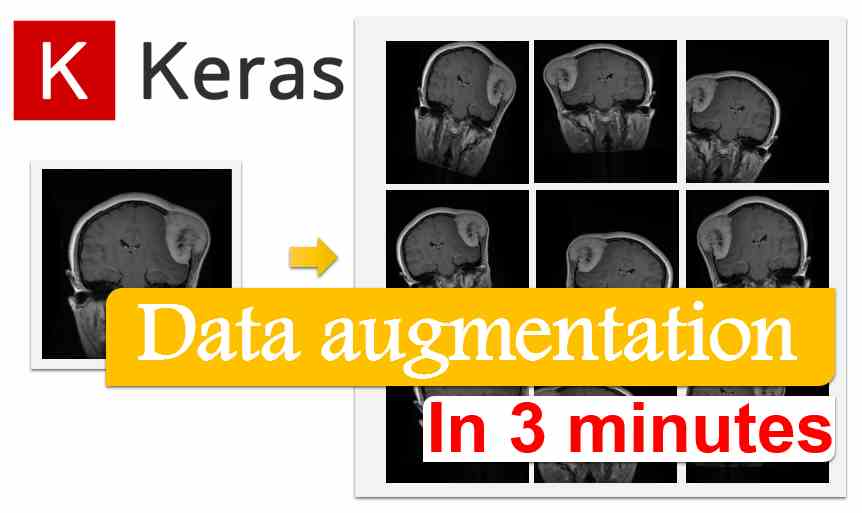
Sample Image
Before we begin, we’ll need a sample image to demonstrate the standard image augmentation techniques, and for that, I’ll be using my own image.

You can use any of your favourite image, and once you have chosen the image, save it in your current working directory.
Libraries
First things first, let’s install the package, and to do that, open your Python terminal and enter the command.
pip install keras
pip install tensorflow
pip install matplotlib
pip install scipy
After the installation is completed, we can import them into our program and start using them.
# Import libraries
from numpy import expand_dims
from keras.preprocessing.image import load_img
from keras.preprocessing.image import img_to_array
from keras.preprocessing.image import ImageDataGenerator
from matplotlib import pyplot
Once all the images and libraries are imported, let’s load our image. The name of my image is “my-picture.jpg” so I’ll be using that, but you have to write your image name.
# Load the image
img = load_img('my-picture.jpg')
Image Augmentation With ImageDataGenerator
The Keras deep learning library allows you to automatically apply data augmentation when training a model.
A variety of techniques and pixel scaling methods are supported, but we’ll be looking into five different types of image augmentation techniques.
1. Random Rotation Argument
Image rotation is a common augmentation approach that allows the model to become invariant to the object’s orientation.
ImageDataGenerator class allows you to randomly rotate images through any degree between 0 and 360 by setting an integer value in the rotation_range argument.
When the image is rotated, certain pixels will move outside of the image, leaving a blank space that must be filled in. You can populate this in a variety of ways, such as providing a constant value, nearest pixel values, and so on. The default value for the fill_mode argument is “nearest“, which simply replaces the empty space with the nearest pixel values.
# expand dimension to one sample
samples = expand_dims(img, 0)

# create image data augmentation generator
datagen = ImageDataGenerator(rotation_range=30, fill_mode='nearest')

# Prepare Iterator
it = datagen.flow(samples, batch_size=1)

# Generate samples and plot
for i in range(9):
    # define subplot
    pyplot.subplot(330 + 1 + i)

    # generate batch of images
    batch = it.next()

    # convert to unsigned integers for viewing
    image = batch[0].astype('uint8')

    # plot raw pixel data
    pyplot.imshow(image)

# Show figure
pyplot.show()
When you run the example, you’ll see samples of the rotated image, including pixels rotated out of the frame and nearest-neighbor fill in certain cases.

2. Horizontal & Vertical Shift Argument
It’s possible that the object isn’t always in the center of the image. To overcome this problem, we can shift the image’s pixels either horizontally or vertically by applying a constant value to all the pixels.
The ImageDataGenerator class has the height_shift_range and width_shift_range arguments for vertical and horizontal picture shifts, respectively. If the value is a float number, it indicates the percentage of the image’s width or height to shift. If it is an integer number, the width or height are simply shifted by that many pixel values.
# expand dimension to one sample
samples = expand_dims(img, 0)

# create image data augmentation generator
# datagen = ImageDataGenerator(width_shift_range=0.2, height_shift_range=0.2, fill_mode='nearest') # shift image 20% of width and height
datagen = ImageDataGenerator(width_shift_range=[-50, 50], height_shift_range=[-50, 50], fill_mode='nearest') # shift image between -50px and 50px of width and height

# Prepare Iterator
it = datagen.flow(samples, batch_size=1)

# Generate samples and plot
for i in range(9):
    # define subplot
    pyplot.subplot(330 + 1 + i)

    # generate batch of images
    batch = it.next()

    # convert to unsigned integers for viewing
    image = batch[0].astype('uint8')

    # plot raw pixel data
    pyplot.imshow(image)

# Show figure
pyplot.show()
3. Random Flips Argument
Flipping images is another great augmentation technique that can be applied to a variety of objects.
For flipping along the vertical or horizontal axis, the ImageDataGenerator class has parameters horizontal_flip and vertical_flip. This technique, however, should be used in accordance with the object in the image. Vertically flipping a person, for example, would be ineffective compared to doing it with a symmetrical object like a football or something else.
# expand dimension to one sample
samples = expand_dims(img, 0)

# create image data augmentation generator
datagen = ImageDataGenerator(horizontal_flip=True, vertical_flip=True)

# Prepare Iterator
it = datagen.flow(samples, batch_size=1)

# Generate samples and plot
for i in range(9):
    # define subplot
    pyplot.subplot(330 + 1 + i)

    # generate batch of images
    batch = it.next()

    # convert to unsigned integers for viewing
    image = batch[0].astype('uint8')

    # plot raw pixel data
    pyplot.imshow(image)

# Show figure
pyplot.show()
4. Random Brightness Argument
It’s also a highly beneficial augmentation approach because our image won’t always be in ideal lighting conditions. As a result, we must train our model on photographs taken in various lighting conditions.
The brightness_range option in the ImageDataGenrator class can be used to control the brightness. It takes a list of two float values and selects a brightness shift value from that range. A number less than 1.0 darkens the image, whereas a value of more than 1.0 brightens it.
# expand dimension to one sample
samples = expand_dims(img, 0)

# create image data augmentation generator
datagen = ImageDataGenerator(brightness_range=[0.2, 1.5])

# Prepare Iterator
it = datagen.flow(samples, batch_size=1)

# Generate samples and plot
for i in range(9):
    # define subplot
    pyplot.subplot(330 + 1 + i)

    # generate batch of images
    batch = it.next()

    # convert to unsigned integers for viewing
    image = batch[0].astype('uint8')

    # plot raw pixel data
    pyplot.imshow(image)

# Show figure
pyplot.show()
5. Random Zoom
The zoom augmentation either zoom in or zoom out the image at random.
In the zoom_range option, the ImageDataGenerator class accepts a float value for zooming. You have to provide the lower and higher limits in a list with two values. Any amount less than 1 will enlarge the image and any value higher than 1 causes the image to zoom out.
# expand dimension to one sample
samples = expand_dims(img, 0)

# create image data augmentation generator
datagen = ImageDataGenerator(zoom_range=[0.2, 1.1])

# Prepare Iterator
it = datagen.flow(samples, batch_size=1)

# Generate samples and plot
for i in range(9):
    # define subplot
    pyplot.subplot(330 + 1 + i)

    # generate batch of images
    batch = it.next()

    # convert to unsigned integers for viewing
    image = batch[0].astype('uint8')

    # plot raw pixel data
    pyplot.imshow(image)

# Show figure
pyplot.show()
Conclusion
And along with that, we’ve learned how to augment images in the simplest and most efficient manner possible. To summarize, we learned how to use the Keras ImageDataGenerator to augment our images on the fly and how you can edit your image to train the model the most efficient way.
There are many more augmentation techniques that I have not covered in this article but I encourage you to check them out in the official documentation.
I’m still learning from you, while I’m trying to achieve my goals. I absolutely enjoy reading all that is posted on your blog. Keep the information coming. I liked it!
I admire your work, thanks for all the great content.
I genuinely enjoy studying on this website, it has great blog posts. “Don’t put too fine a point to your wit for fear it should get blunted.” by Miguel de Cervantes.